

Table of Contents
- Why Wall Damage Happens When Hanging Canvas
- Best Adhesive Strips for Canvas Art
- Surface Preparation: The Foundation for Damage-Free Hanging
- Hanging Heavy Canvas Without Nails
- How to Remove Adhesive Strips Without Peeling Paint
- Rental-Friendly Hanging Solutions
- Step-by-Step Guide: Hanging Your Canvas Without Damage
- Common Mistakes to Avoid
Last Updated: August 11, 2026
Why Wall Damage Happens When Hanging Canvas
Canvas art transforms a room, but improper hanging damages walls and deposits. Wall damage stems from three avoidable causes: using the wrong hanging method for your wall type, failing to prepare the surface properly, or underestimating adhesive weight capacity. When you rush preparation or grab whatever strips are nearest, the canvas shifts, adhesive fails, and you're left repairing drywall.
Different wall surfaces behave differently. Textured walls, freshly painted drywall, wallpapered surfaces, and older plaster all have different adhesion properties. What works on smooth drywall can fail completely on textured walls because adhesive can't make full contact. Humidity and climate variations also affect performance, a strip that holds in a dry room may lose strength in a bathroom where moisture fluctuates.
Understanding these failure points lets you avoid them entirely. By matching your hanging method to your wall type, preparing your surface correctly, and calculating canvas weight properly, you can hang art without damage.
Best Adhesive Strips for Canvas Art
Adhesive strips designed for canvas art come in several varieties. The key difference between products is the adhesive formulation and backing material.
Adhesive Strips vs Tabs for Different Wall Types
Standard adhesive strips feature a larger surface area and work well on smooth, clean drywall. They distribute weight evenly across a wider footprint, making them ideal for medium-weight canvas prints.
Adhesive tabs are smaller and designed for lighter loads. They're useful for multiple small frames or when your wall has minor texture preventing full contact with larger strips. However, tabs won't support heavy canvas prints.
For textured walls, neither standard strips nor tabs grip well because they can't achieve full surface contact. In these cases, you need wall anchors with mounting hardware or a different approach. Some people sand down the textured area slightly to create a smooth patch, though this requires careful work.
Climate matters too. In high-humidity areas, kitchens, bathrooms, or coastal properties, adhesive performance degrades faster as moisture weakens the bond.
Weight Capacity and Tensile Strength
Every adhesive strip has a rated weight capacity printed on the packaging. This represents the maximum weight under ideal conditions: smooth, clean wall, room-temperature climate, and proper installation.
In practice, actual weight capacity is often lower. If your wall is textured, dusty, or recently painted, the adhesive won't achieve full contact, reducing holding power. A strip rated for 5 kg might safely hold only 3-4 kg in real-world scenarios.
Calculate your canvas weight before selecting strips. This includes the frame, canvas, and backing. Weigh your completed piece on a bathroom scale if possible. Always choose strips rated for at least 50% more weight than your canvas actually weighs. A canvas weighing 2 kg should use strips rated for at least 3 kg.
Surface Preparation: The Foundation for Damage-Free Hanging
Surface preparation is where most people cut corners, and it's where most damage begins. A poorly prepared wall causes adhesive failure, leading to the canvas falling and potentially damaging both wall and print.
Your wall needs to be clean, dry, and as smooth as possible. Dust, grease, and old paint particles create a barrier between adhesive and wall surface, preventing proper bonding. Even light dust can reduce adhesive effectiveness by 20-30%.
Cleaning and Wall Texture Compatibility
Start by cleaning the area where you'll hang your canvas. Use a slightly damp cloth with warm water and a small amount of isopropyl alcohol. Isopropyl alcohol evaporates quickly without leaving residue, making it ideal for wall preparation. Wipe thoroughly and let dry completely, moisture prevents adhesive from setting properly.
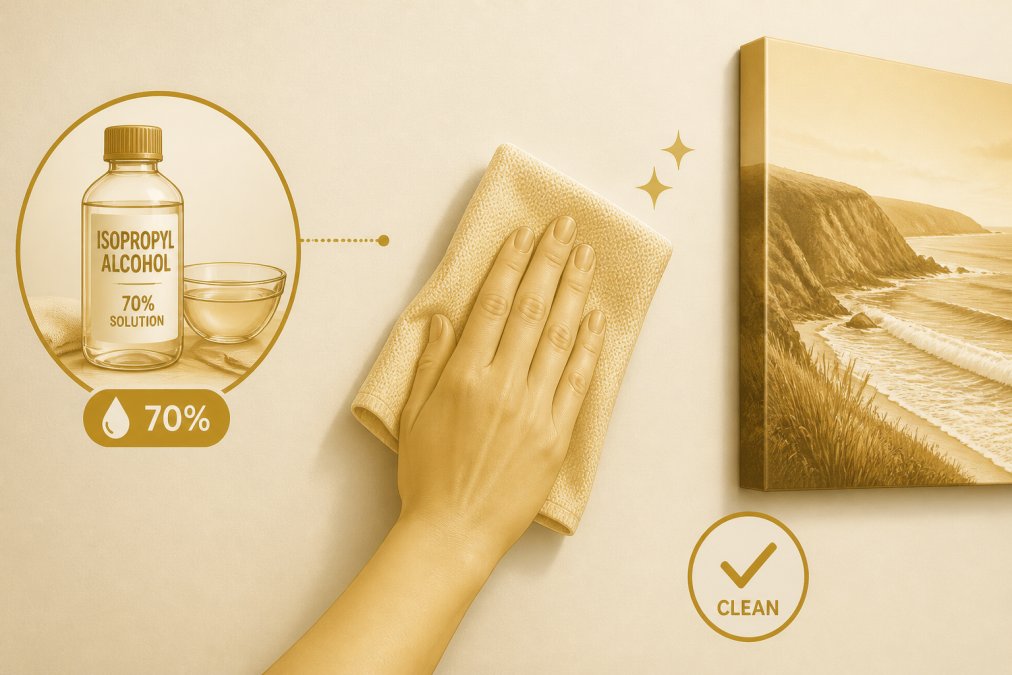
For textured walls, cleaning is more challenging because dust settles into the texture. A slightly damp microfibre cloth works better than paper towels. If your wall is heavily textured, consider whether adhesive strips will work at all. Textured surfaces have poor contact with flat adhesive strips, dramatically reducing weight capacity.
If you're determined to use adhesive strips on textured walls, lightly sand the textured area using fine-grit sandpaper (220 grit or higher) in circular motions until mostly flat. Vacuum or wipe away all dust afterward. Alternatively, apply a primer or sanding sealer to fill in texture and create a smoother surface. Allow complete drying before applying adhesive strips.
Wall texture compatibility is often overlooked but is one of the most common reasons adhesive strips fail.
Hanging Heavy Canvas Without Nails
Heavy canvas prints, anything over 3 kg, require stronger solutions than standard adhesive strips without drilling holes.
Hook and Loop Fasteners for Load-Bearing Support
Hook and loop fasteners offer excellent load-bearing support for heavy canvas. Attach the hook side (rough texture) to your wall and the loop side (soft texture) to the canvas frame back. When pressed together, they create a surprisingly strong bond.
The advantage is that they distribute weight across a larger area than adhesive strips, increasing effective load capacity. They're also adjustable, if your canvas isn't perfectly level, you can reposition it without damaging the wall.
For heavy canvas, use industrial-strength hook and loop fasteners rated for at least your canvas weight. Apply the hook side to the wall using strong adhesive, and attach the loop side to the canvas frame using construction adhesive or a hot-glue gun.
Wall Anchors and Mounting Hardware Alternatives
For permanent installations or maximum security, wall anchors combined with mounting hardware offer the strongest solution. Plastic expansion anchors or toggle bolts can hold canvas prints weighing 10 kg or more, depending on anchor type and wall material.
Installation requires drilling small holes (typically 6-8 mm) that are easily patched with filler if needed. Wall anchors distribute weight through the wall structure itself, not just surface adhesion. For drywall, plastic expansion anchors work well. For plaster or older walls, toggle bolts or heavy-duty anchors designed for those materials are necessary.
How to Remove Adhesive Strips Without Peeling Paint
Removing adhesive strips badly causes more wall damage than hanging the canvas did. The right removal technique leaves no damage and no residue.
Step-by-Step Residue-Free Removal
The key to residue-free removal is patience. Gently peel one corner of the adhesive strip away from the wall at a shallow angle (45 degrees or less). Don't pull straight out from the wall. Pull slowly and steadily, maintaining that shallow angle. If the strip resists, stop and try a different corner.
If the strip won't budge, apply heat. A hair dryer on medium heat, held 15 cm from the wall for 30 seconds, softens the adhesive. After heating, try peeling again with the same shallow-angle technique.
Once the strip is off, remove any residue using isopropyl alcohol on a soft cloth. Dampen the cloth lightly, press it against the residue, and rub gently in circular motions. The alcohol dissolves remaining adhesive without harming the wall or paint. Let the wall dry completely afterward.
Dealing with Delicate Wallpaper and Paint
Wallpapered walls require extra care because adhesive strips can damage wallpaper when removed. Test the strip on an inconspicuous area first. If wallpaper comes away with the strip, adhesive strips aren't suitable.
For delicate or freshly painted walls, use the same shallow-angle technique but move even more slowly. If paint starts to peel, stop immediately and apply more heat. If you cause minor paint damage, sand lightly with fine-grit sandpaper and touch up with matching paint.
Rental-Friendly Hanging Solutions
For renters, the challenge is hanging canvas art without leaving marks. Most rental agreements prohibit nail holes and wall damage, making temporary installation methods essential.
Adhesive strips are the most popular rental-friendly option because they leave no permanent marks when removed correctly. However, they require a clean, smooth wall and won't work well on textured surfaces without preparation.
Temporary Installation Methods That Leave No Mark
Beyond adhesive strips, several other methods work well for rentals. Tension rods designed for hanging artwork can be mounted using adhesive strips at the top, with canvas hanging from the rod. This distributes weight differently and works for lighter pieces.
Leaning canvas against the wall, propped up with a small shelf or ledge, avoids any wall contact entirely. This works for medium-weight canvas and creates a gallery-like appearance.
Command hooks and strips, specifically designed for temporary hanging, are another option. They're similar to standard adhesive strips but formulated to remove cleanly without leaving residue or damage. They work well on smooth walls and are widely available.
The most important thing with any temporary method is testing it first. Try it in a closet or inconspicuous area, wait a few days, then test removal. This gives confidence before hanging in visible locations.
Climate and Humidity Considerations for Adhesive Performance
Rental properties vary widely in climate control. Some have excellent temperature and humidity regulation; others fluctuate significantly with seasons.
Adhesives lose tensile strength in high-humidity environments. If your rental is in a damp area, near the coast, in a basement flat, or in a humid region, adhesive strips will fail faster. You might need stronger products or plan to replace strips annually.
Before hanging canvas in a rental, observe the climate for a few weeks. Notice whether walls feel damp, whether there's window condensation, or whether the air feels very dry. This observation helps you choose the most suitable hanging method.
Step-by-Step Guide: Hanging Your Canvas Without Damage
Now that you understand the principles, here's the practical process for hanging canvas safely.
Calculating Canvas Weight and Levelling Your Installation
Before buying adhesive strips or hardware, know exactly how much your canvas weighs. If ordering from paints2prints, weight will be listed in product specifications. If you already have your canvas, weigh it on a bathroom scale, including frame, backing, and any hardware.
Once you know the weight, select adhesive strips or hardware rated for at least 50% more than that weight. If your canvas weighs 2 kg, choose strips rated for 3 kg or more.
Decide where on the wall you want to hang the canvas. A common guideline is to hang artwork so the centre is at eye level, roughly 150-160 cm from the floor. However, this varies depending on furniture layout and personal preference. Hold the canvas against the wall and step back to see how it looks before committing.
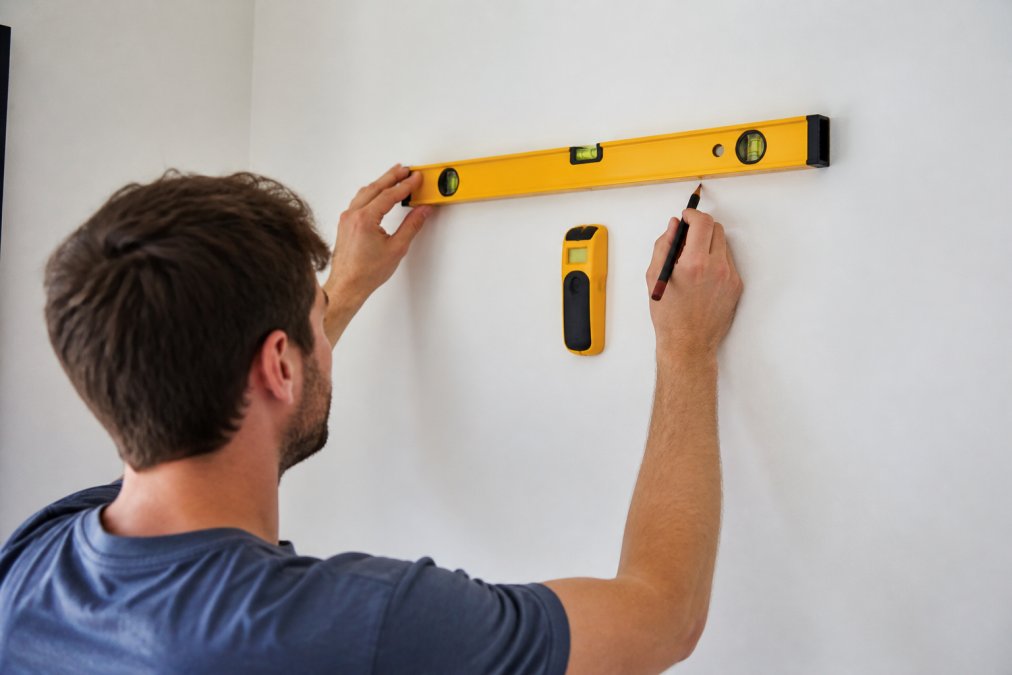
Use a spirit level to ensure your canvas will hang straight. Mark positions where adhesive strips or hardware will go using a pencil. Light pencil marks are easy to erase later and won't show once the canvas is in place.
Securing Bumpers for Frame Stability
Bumpers are small rubber or felt pads that go on the back corners of your canvas frame. They prevent the canvas from sitting flush against the wall (which can trap moisture and damage both wall and canvas) and allow slight movement that reduces stress on adhesive strips or hardware.
Install bumpers on the bottom two corners of your canvas frame before hanging. They should be about 2-3 cm tall, creating visible space between frame and wall. Use strong adhesive or a hot-glue gun to attach them.
When you hang the canvas, bumpers will make contact with the wall first, bearing some weight and preventing the frame from pressing directly against the wall surface. This is especially important in humid environments where trapped moisture can cause mold or paint damage.
After hanging, step back and check that the canvas is level and secure. Gently push the bottom of the frame to ensure it doesn't shift. If it does, the adhesive strips or hardware aren't holding properly, and you should remove the canvas and try again with stronger products or better surface preparation.
Common Mistakes to Avoid
Not cleaning the wall properly is the single biggest cause of adhesive failure. Dust and grease prevent adhesion, but many people skip this step or do a cursory wipe. Spend two minutes cleaning with isopropyl alcohol and let the wall dry completely. This one step eliminates most adhesive failures.
Underestimating canvas weight leads people to use strips that aren't strong enough. If you're unsure about weight capacity, choose stronger strips. The cost difference is minimal.
Using the wrong adhesive for your wall type is another common error. Textured walls need special preparation or different hardware. Wallpapered walls need testing before full installation. Plaster walls need anchors designed for plaster, not drywall anchors.
Hanging canvas immediately after application is risky. Most adhesive strips need 24 hours to reach full strength. Wait a full day after applying strips before hanging.
Hanging without levelling makes the canvas look wrong and creates uneven stress on adhesive strips. Use a spirit level every time.
Finally, improper removal causes the most visible wall damage. Yanking strips straight off peels paint. Always use the shallow-angle technique, apply heat if necessary, and use isopropyl alcohol to remove residue gently.
Hanging canvas art without damaging your walls is entirely achievable when you understand your wall type, prepare properly, and use the right materials. The difference between a canvas that stays secure for years and one that falls within months comes down to surface preparation, weight calculation, and choosing adhesive products matched to your specific situation. paints2prints offers customizable canvas prints in framed and unframed finishes, and when combined with these hanging techniques, your new artwork will transform your space without leaving a trace when it's time to take it down.
Frequently Asked Questions
Can you hang an unframed canvas painting without damaging the wall?
Yes. Unframed canvas can be hung safely using adhesive strips, hook and loop fasteners, or mounting putty rated for the canvas weight. The key is proper surface preparation, clean the wall thoroughly with isopropyl alcohol to remove dust and residue, which improves adhesive grip. For unframed canvas, ensure the back is flat and use bumpers or spacers to prevent the edges pressing directly against the wall, which can cause paint peeling over time.
What are the best adhesive strips for hanging heavy canvas without nails?
Heavy-duty adhesive strips designed for picture hanging work best. Look for strips with high tensile strength and weight capacity clearly marked on the packaging. Hook and loop fasteners offer superior load-bearing support compared to basic adhesive tabs. For canvas heavier than 3 kg, consider wall anchors or mounting hardware instead. Always check your wall type, textured drywall, plasterboard, and painted surfaces all affect adhesive performance differently. Test on a small inconspicuous area first if unsure.
How do I remove adhesive strips without peeling paint or wallpaper?
Remove adhesive strips slowly and carefully by pulling at a shallow angle close to the wall surface, not straight outward. If the strip resists, use a heat source like a hairdryer on low to warm the adhesive for 20-30 seconds, which softens the bond. For any remaining residue, rub gently with a cloth dampened in isopropyl alcohol. On delicate wallpaper, test the alcohol on a hidden area first. Never use sharp tools to scrape adhesive, this risks gouging the wall or tearing wallpaper. Allow time for the wall to recover before redecorating.
Are adhesive strips safe for all wall types and textures?
Adhesive strips work best on smooth, clean surfaces like painted drywall and plasterboard. Heavily textured walls, brick, or unprimed surfaces may not provide adequate grip. Always clean the wall first with isopropyl alcohol to remove dust and improve adhesive contact. Test the adhesive on a small area before committing your canvas. Climate and humidity also matter, adhesive performs better in moderate temperatures and humidity levels. If your wall is very damp or you live in a humid area, consider hook and loop fasteners or wall anchors as more reliable alternatives.
This article was written using GrandRanker
0 comments